NFC Floppy Disk Game Launcher
As retro-gaming enthusiasts, we have a broad collection of old PC game files that we can conveniently play on modern PCs via DOSBox, SCUMMVM, and other utilities. But when playing on modern hardware, you lose some of the “magic” - for the real retro experience, those who are true purists will actually go and find some old hardware, set it up with an old DOS or Windows 3.1 build, and then install the actual games there. But this is very impractical… so, what if there was a way to simulate the retro experience, with modern technology?
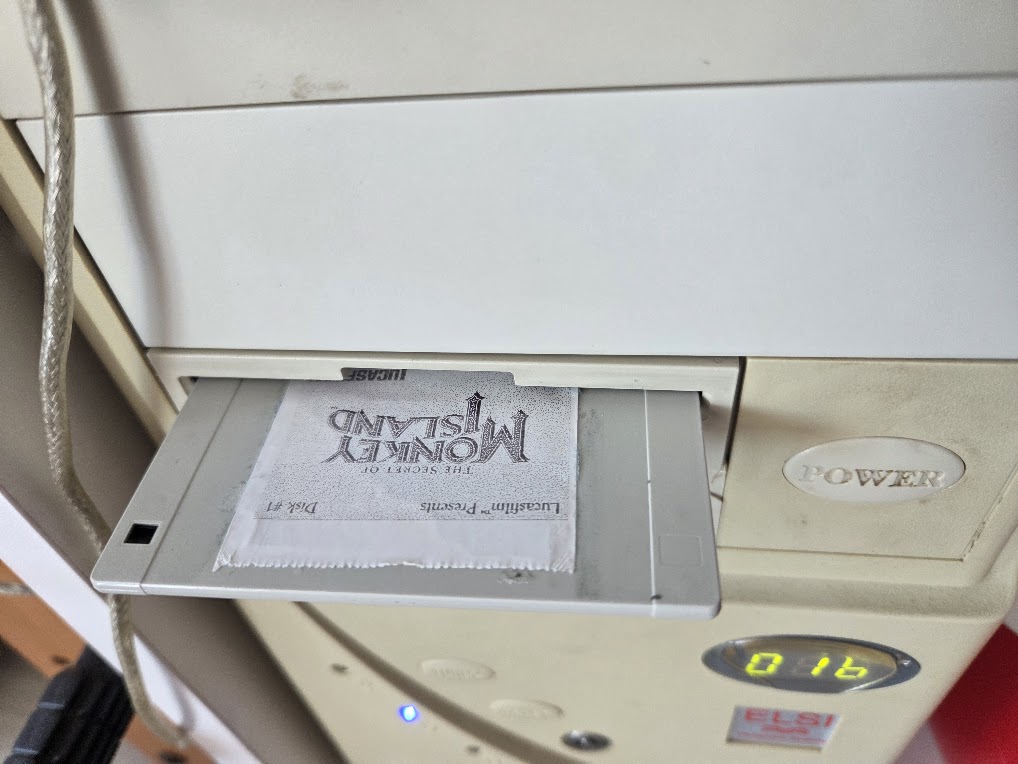
That is exactly what we’ve done: we’re built ourselves a retro PC, using a 386x case, but with a modern PC inside. On it, we’ve installed a fake floppy drive that loads games using NFC - but seemingly, it looks as if they are magically loading from the floppy disks. Read on to learn how!
In a nutshell
As you can imagine, there’s nothing more to this than using retro facades to hide modern hardware: we replaced the innards of the floppy drive with an Arduino hooked to an NFC reader module; Then, each floppy disk has an NFC sticker, that when inserted in the drive gets it’s ID read.
The Arduino program is continuously reading for IDs, and sends them to the PC through the USB-serial port. On the PC, a python script runs in the background reading this port, and has a hardcoded list of NFC ids, each mapped to an execution command that gets run on a subprocess.
Hardware
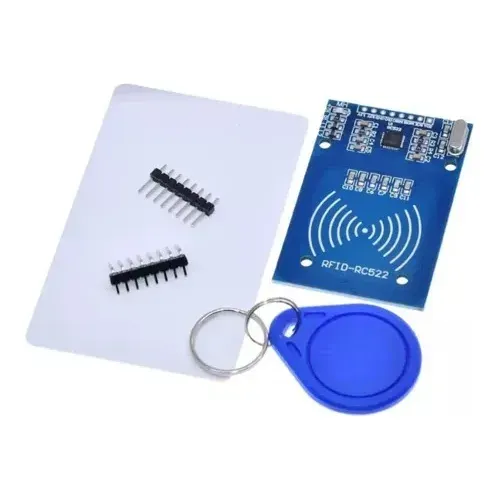
We used an Arduino UNO, with an MFRC522 NFC/RFID module running at 13.56MHz, which supports ISO/IEC 14443 Type A cards, MIFARE, and NTAG formats and has a reading range of 1-3cm. And most importantly, there’s a community-maintained Arduino library for these modules.
The MFRC522 module needs to be positioned where it can reliably read NFC tags inside inserted floppy disks. However, we found that the metallic shell holding the disks in place was interfering with the readings, so we had to replace it with a more inert material - including the insertion/ejection button. We made a replacement structure out of LEGO building blocks - it was incredibly simple to put together and works like a charm!
<video width=”600” height=”400” controls style=”display: block; margin: 0 auto; text-align: center;>
Your browser does not support the video tag. </video>
The NFC is connected to the Arduino with the following pinage:
- VCC → 3.3V (important: not 5V!)
- GND → Ground
- RST → Digital Pin 9
- SS → Digital Pin 10
- MOSI → Pin 11 (SPI)
- MISO → Pin 12 (SPI)
- SCK → Pin 13 (SPI)
And the Arduino itself is connected to the computer via USB for both power and serial communication.
Software
The Arduino is running a script that continuously polls for NFC tags using the aforementioned MFRC522 library (needs installing as a prerequisite) and sends their unique identifiers via serial communication.
#include <SPI.h>
#include <MFRC522.h>
#include <Wire.h>

#define SS_PIN 10
#define RST_PIN 9

MFRC522 mfrc522(SS_PIN, RST_PIN);

void setup() {
  Serial.begin(9600);
  SPI.begin();
  mfrc522.PCD_Init();
  Serial.println("NFC Floppy Reader Ready");
}

void loop() {
  if (!mfrc522.PICC_IsNewCardPresent()) {
    return;
  }

  if (!mfrc522.PICC_ReadCardSerial()) {
    return;
  }

  // Send UID via serial
  for (byte i = 0; i < mfrc522.uid.size; i++) {
    Serial.print(mfrc522.uid.uidByte[i] < 0x10 ? "0" : "");
    Serial.print(mfrc522.uid.uidByte[i], HEX);
  }
  Serial.println();

  mfrc522.PICC_HaltA();
  delay(1000);
}
And the PC is running a Python script that monitors the serial port, mapping the NFC tag IDs to different followup commands, to launch the games or applications. Uses the pyserial library, which you’ll need to install too.
import serial
import subprocess
# Mapping NFC tag UIDs to games/applications
rfid_to_game = {
    "04a1b2c3": "wine ~/.wine/drive_c/Games/DoomII/doom2.exe",
    "05d4e5f6": "/usr/games/dosbox ~/Games/Commander_Keen/keen.exe",
    "06g7h8i9": "steam steam://rungameid/12345",
    "07j8k9l0": "/home/user/scripts/launch_emulator.sh"
}
try:
    arduino = serial.Serial('/dev/ttyUSB0', 9600, timeout=1)
    print("Connected to NFC Floppy Reader")

    while True:
        if arduino.in_waiting > 0:
            tag_id = arduino.readline().decode('utf-8').strip().lower()

            if tag_id in rfid_to_game:
                print(f"Launching game for tag: {tag_id}")
                subprocess.run(rfid_to_game[tag_id], shell=True)
            else:
                print(f"Unknown tag: {tag_id}")

except KeyboardInterrupt:
    print("Shutting down...")
finally:
    arduino.close()
This approach allows for maximun flexibility: a game can use wine, while another can run on DosBOX, or even if you need a sequence of commands, you can map to a custom shell script. The script spawns a subprocess shell to run the game launch command, and that’s it.
We’re using Ubuntu on the PC, so these commands are run in the default shell (bash). The script is setup to autoload at system startup using crontab. But we’ll leave all the details of the retro-pc for another post.
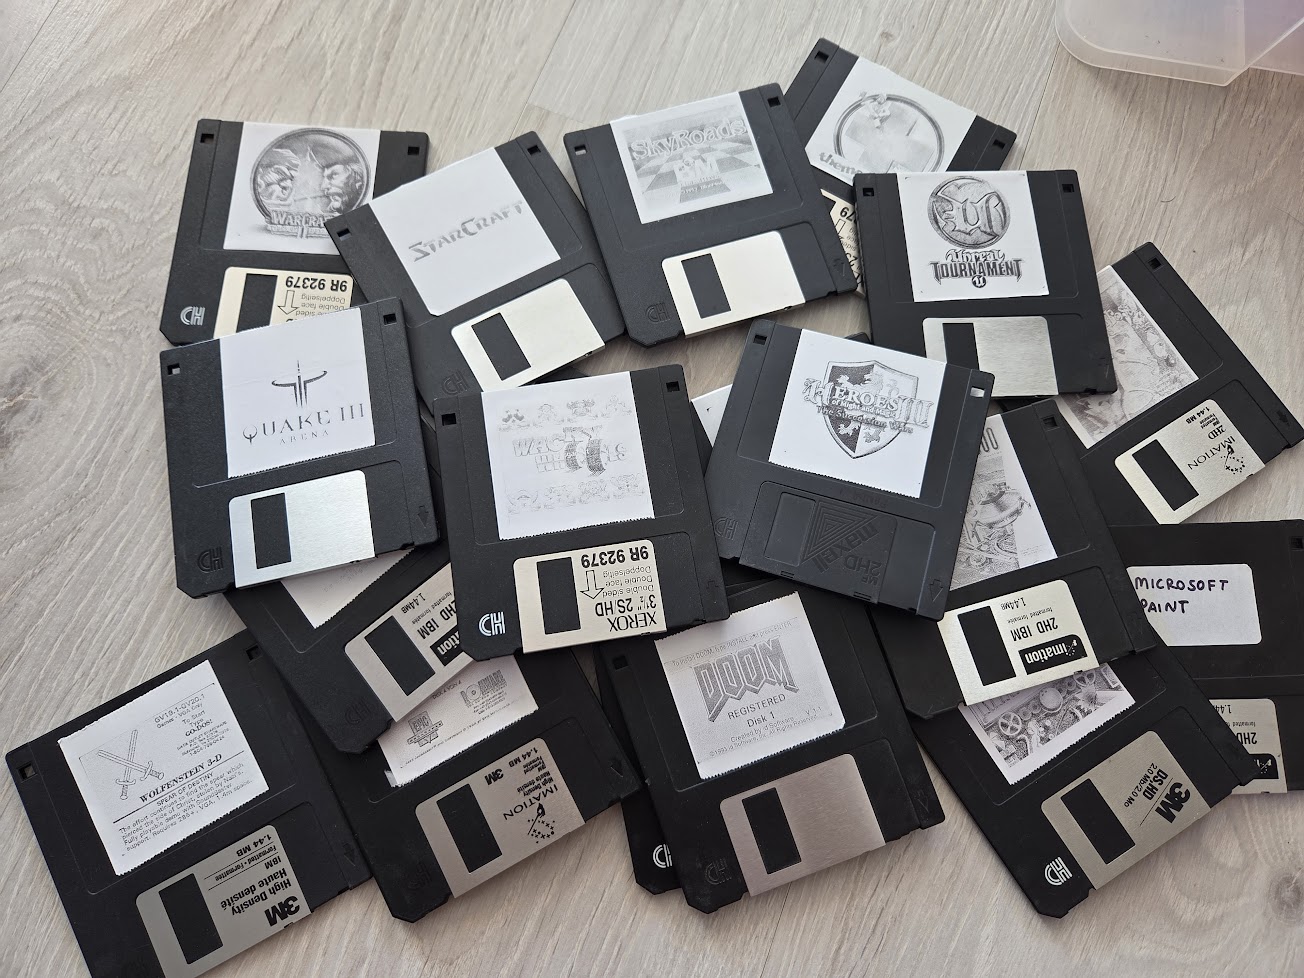
Creating Game Disks
Arguably, the most fun part of the project is creating the game collection. We used old floppy disks, and attached an NFC tag on the back of each of them - and of course, a sticker label on the front. We use a mini thermal printer for the stickers, which also give them a clunky retro feel.
For each disk, we’ll need to know the NFC tag ID so that we can add it to the hardcoded list on the python script. When the script reads an unknown tag, it prints the ID in the log, so we can copy and then paste it in the mapping list with the adequate command.
Final experience
The whole thing is mounted on an old 386x case, keeping the floppy drive frontal panel, so it looks completely inconspicuous. We have the experience of the look and feel of a retro-PC, with the games magically loading instantly. And with the convenience of a modern OS with emulators for installation and maintenance.
For reference, you can find the updated source code for this project on GitHub. We’d love to know if you build your own!